릴리즈 2.18.0 이상
하이퍼링크의 OG 태그를 파싱하여 링크에 대한 미리보기를 제공합니다.
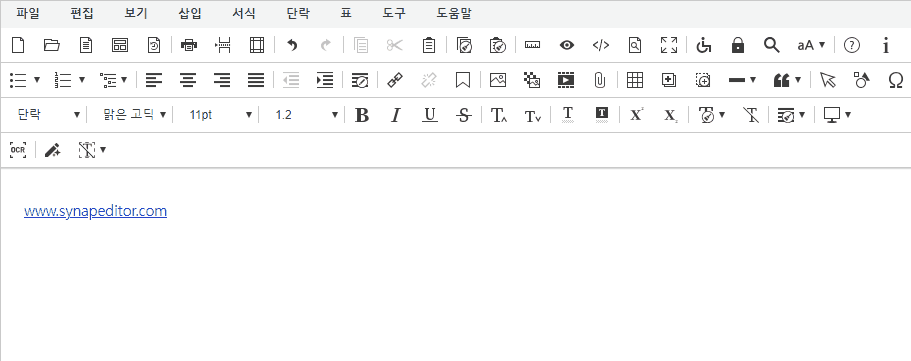
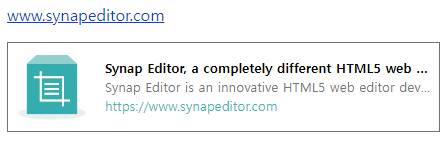
유효한 하이퍼링크 입력 시, 해당 링크의 썸네일 및 관련 정보를 미리 볼 수 있습니다.

동작조건
| 액션 | 예시 |
|---|---|
| 링크 삽입 |
|
| 링크 텍스트 입력 후 Enter |
|
| 링크 복사/붙여넣기 |
|
사용방법
플러그인 파일 불러오기
<!-- SynapEditor 객체가 존재해야 적용할 수 있기 때문에 에디터 스크립트 파일 아래에 include 해야 합니다 --> <script src="ogParser.min.js의 url"></script>
플러그인 설정하기
사용 가능한 키
Key | Type | 필수 | 설명 |
|---|---|---|---|
url | string | O |
|
customTemplateWithImage | string |
| |
customTemplateWithoutImage | string |
|
에디터 설정
// url 에는 OG 태그를 파싱하는 API 주소가 설정되어야 합니다. // customTemplateWithImage 은 이미지가 존재할 경우 생성되는 URL 미리보기 HTML입니다. // customTemplateWithoutImage 은 이미지가 존재하지 않을 경우 URL 미리보기 HTML입니다. 'ogParser.config': { 'url': '/ogParser', 'customTemplateWithImage': ``, // 이미지 있을 때 커스텀 템플릿 'customTemplateWithoutImage': `` // 이미지 없을 때 커스텀 템플릿 }
기본 템플릿
- 템플릿 설정을 따로 하지 않았을 경우 해당 HTML이 적용되어 미리보기 URL이 보여집니다.
| 미리보기 | 적용된 HTML | |
|---|---|---|
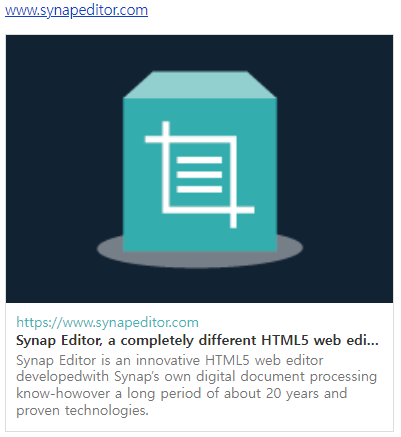
| 썸네일이 있을 경우 |
| HTML <div style="width: 387px; border: 1px solid #ddd; color: #333; background-color: #123; text-align: center;">
<img src="#{image}" style="height: 268px; max-width: 387px; display: block;">
<div style="overflow: hidden; padding: 10px 10px 10px 10px; text-align: left; background-color: #FFF; display:block;">
<a href="#{url}" style="font-size: 14px; color: #39b6b8; text-decoration: none; margin-top: 0px; margin-bottom: 3px;">#{url}</a>
<p style="white-space: nowrap; overflow: hidden; text-overflow: ellipsis; font-size: 14px; font-weight: bold;
margin-top: 0px; margin-top: 0px; margin-bottom: 3px;">#{title}</p>
<p style="font-size: 14px; color: #757575; margin-top: 0px; margin-bottom: 3px;">#{description}</p>
</div>
</div>
|
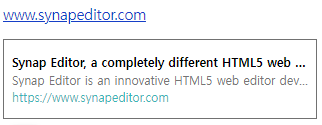
| 썸네일이 없을 경우 |
| HTML <div style="box-sizing: border-box; border: 1px solid #717171; font-size: 0; width: 314px; height:80px; padding: 15px 8px; max-width: 100% !important;"> <p style="font-size: 12px; font-weight: bold; white-space: nowrap; margin-top: 0px; margin-bottom: 3px; overflow: hidden; text-overflow: ellipsis;">#{title}</p> <p style="font-size: 12px; color: #757575; white-space: nowrap; margin-top: 0px; margin-bottom: 3px; overflow: hidden; text-overflow: ellipsis;">#{description}</p> <p style="font-size: 12px; white-space: nowrap; margin-top: 0px; margin-bottom: 3px; overflow: hidden; text-overflow: ellipsis; color: #39b6b8;"> <a href="#{url}" style ="text-decoration: none; color: #39b6b8;">#{url}</a> </p> </div>
|
커스텀 템플릿 설정 방법
HTML에 포함된 태그
- 커스텀 템플릿 HTML 코드 내부에 존재하는 태그들은 서버에서 반환된 값들로 바인딩되어 보여집니다.
- 아래는 바인딩될 수 있는 태그를 정리한 표입니다.
| tag | 의미 | 설명 |
|---|---|---|
| #{title} | 제목 |
|
| #{description} | 설명 |
|
| #{image} | 썸네일 |
|
| #{url} | 링크 |
|
커스텀 템플릿 설정 예시
| 미리보기 | 템플릿 설정 |
|---|---|
| 에디터 설정 'ogParser.config': {
...
'customTemplateWithImage': `
<div style="width: 387px; border: 1px solid #ddd; color: #333; background-color: #123; text-align: center;">
<img src="#{image}" style="height: 268px; max-width: 387px; display: block;">
<div style="overflow: hidden; padding: 10px 10px 10px 10px; text-align: left; background-color: #FFF; display:block;">
<a href="#{url}" style="font-size: 14px; color: #39b6b8; text-decoration: none; margin-top: 0px; margin-bottom: 3px;">
#{url}</a>
<p style="white-space: nowrap; overflow: hidden; text-overflow: ellipsis; font-size: 14px; font-weight: bold;
margin-top: 0px; margin-top: 0px; margin-bottom: 3px;">#{title}</p>
<p style="font-size: 14px; color: #757575; margin-top: 0px; margin-bottom: 3px;">#{description}</p>
</div>
</div>`,
...
}
|
| 에디터 설정 'ogParser.config': {
...
'customTemplateWithImage': `
<div style="box-sizing: border-box; border: 1px solid #808080; font-size: 0; width: 772px; overflow: auto;">
<div style="box-sizing: border-box; float: left; width: 520px; height:108px; padding: 12px 8px;">
<p style="font-size: 18px; font-weight: bold; white-space: nowrap; margin-top: 0px; overflow: hidden;
text-overflow: ellipsis;">#{title}</p>
<p style="font-size: 14px; color: #666; white-space: nowrap; overflow: hidden; text-overflow: ellipsis;">#{description}</p>
<p style="font-size: 14px; white-space: nowrap; overflow: hidden; text-overflow: ellipsis; color: #39b6b8;">
<a href="#{url}" style="text-decoration: none; color: #39b6b8;">#{url}</a></p>
</div>
<div style="box-sizing: border-box; float: left; height: 108px; width: 250px; background: url(#{image}) no-repeat center center;
background-size: cover;"></div>
</div>`,
...
}
|

서버 반환 값 JSON 예시
| key | type | value |
|---|---|---|
| title | String |
|
| description | String |
|
| image | String |
|
| url | String |
|
에디터 설정
{
    "image": "https://www.synapsoft.co.kr/wp-content/uploads/2020/04/product03.png",
    "description": "Synap Editor is an innovative HTML5 web editor developed with Synap’s own digital document processing know-how over a long period of about 20 years and proven technologies.",
    "title": "Synap Editor, a completely different HTML5 web editor",
    "url": "https://www.synapeditor.com"
}